What to make when your Marvel loving 5 year old wins a Raspberry Pi2 and needs a new bed?
He also wanted a high bed and loves making dens.
So I made a bed based on the S.H.I.E.L.D Helicarrier (Loosely) with a den underneath.
Video link
https://drive.google.com/file/d/0B4Cz3BuXL6XrUkhTT24tVFc1Y1k/view?usp=sharing


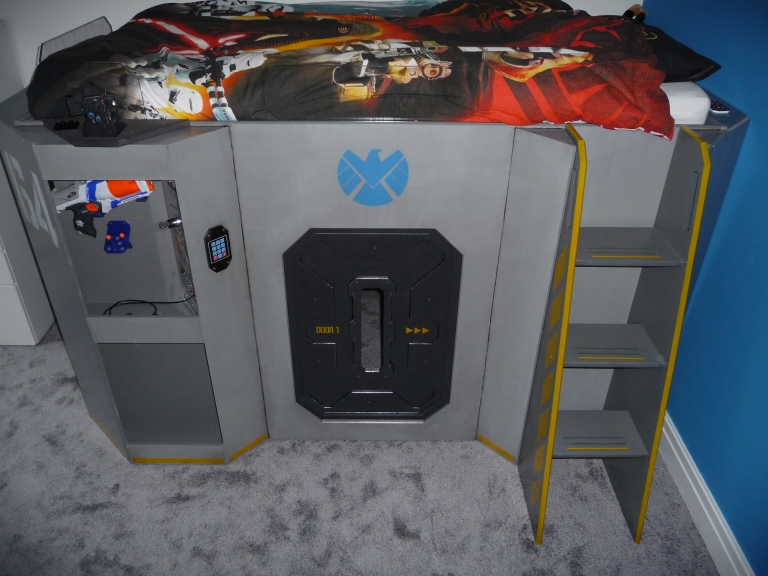

Arduino Mega controlled stepper motor driven sliding door. Keypad and oled display for password to open door.

Inside the Raspberry Pi controls a missile launcher with a Pi camera glued on the side and a torch on the other side for night time shooting.

Camera view, missile can be seen on the left of the screen

Camera image in a dark room with the missile launcher light on

Display storage for Thors hammer and Capt. Americas’s shield. Ironman mask is fixed because EL tape lights up the eyes, also this mask was cracked requiring gluing back together and bodyfilling the join which is why its sprayed silver.


Internal lights on! Shield logo lights up using LED strips, Arc Reactor lights using EL tape when a button is pressed (On a timer because the high pitched inverter squeal would drive you mad) and blue LED back lighting behind lower panels.


RGB LED strips for display bits and overhead lighting.

Borrowed this idea from here http://imgur.com/a/DyQZL Kudos, excellent way of making a illuminated panel, also took several attemps to get the etching right although most of the problem was me not knowing how to use the laser cutter software.

External lights switched from shelf behind pillow


————————————————————-
BUILDING
Steps made from 18mm ply, would look great just varnished.


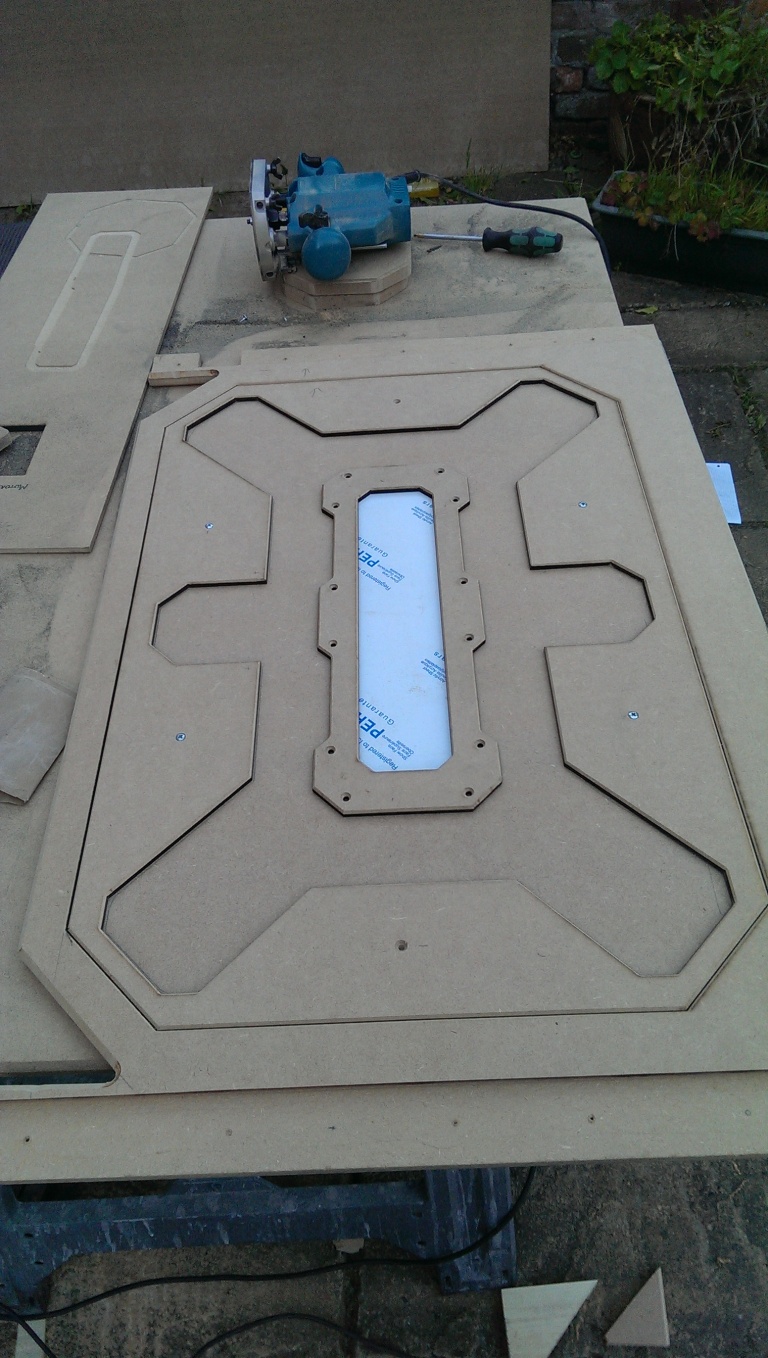
Several days cutting, routering, sanding etc. Door and router templates laser cut @doesliverpool maker space which sped up routering and gave a real accuracy to the openings.
Then painting with helpers. Trial assembly and adding supports took another couple of days. Paint is white undercoat with black gloss added to produce a semi gloss finish in four different shades of grey. Weathered with black gloss thinned with white spirit and washed over to give the look of grime run off on the exterior of the bed. First go at weathering paint effects, a bit hit and miss.


Laser cut nice bits and adding them, probably my favourite bit!


And onto wiring up, started out with slotted cable trunking to make a professional looking panel but gradually got more casual with my efforts. An old PC ATX power supply powers 12v for Lights, Arduino, Stepper motor. 5v for FX board and USB hub and 3.3v for LED torch.
The power supply is turned on by a switch on the outside which latches the remote ON via a relay, when the switch is turned off separate contacts on the switch are connected to an input on the arduino which starts a shutdown program which closes the door and safely shuts down the Pi via another relay connected to GPIO pins.
The Pi has its own switch that latches ON and can only be turned off by a controlled shutdown by the arduino or using the Pi itself

Dream Cheeky USB Missile Launcher with Pi camera mounted in laser cut housing on one side and LED torch mounted on other side. Sprayed dark grey to match bed and weathered with silver paint


Testing the Pi works in its new home. Arcade joystick connects to 5 GPIO pins. I used https://github.com/codedance/Retaliation code to drive the missile launcher over usb but spent hours and hours trying to write a program to read the GPIO inputs and convert it to give a usb command.

The door is made from 12mm MDF with 6mm MDF glued and screwed to it to give depth and a perspex window in the middle. It slides on heavy duty drawer runners attached to a 3D printer drive belt and driven by a stepper motor.

The door is controlled by Arduino Mega with a proto board hat, originally so I could solder all the connections and make a neat job with solid core cable. I changed my mind and decided to stick with jumper cables for the majority of the wiring here as I want my boys to hack it and play about with it in the future. Also in here is a Sparkfun Easydriver board for the stepper motor and an Adafruit FX board for the sound effects.


Things still to do, Make doors for external openings, Add a capacitance touch sensor to the door to stop it trapping fingers.
Thanks to
DoesLiverpool for help, endless enthusiasm and use of the workshop http://doesliverpool.com/
Brimark Signs for being allowed to raid their scrap bin for all the Perspex http://www.brimark-signs.com/Eco
Raspberry Pi for running competitions and educating the next gen https://www.raspberrypi.org/blog/christmas-competition/
Adafruit for excellent products and even better tutorials https://learn.adafruit.com/adafruit-audio-fx-sound-board
A Jenkins for the retaliation code https://github.com/codedance/Retaliation
Raspberry Pi Geek for the shutdown program http://www.raspberry-pi-geek.com/Archive/2013/01/Adding-an-On-Off-switch-to-your-Raspberry-Pi
Arduino forums and playground for codes snippets and help with programming the Oled display

No rails? My kid rolls around like a Rhino at night, he’d be on his head on the floor in no time
LikeLike
Its got perspex sides, probably hard to see in the camera phone photos, he ain’t hit the floor yet!
LikeLike
Put a classic arcade emulator on the Pi. Why? “This kid is playing Galaga!”
LikeLike
Just BRILLIANT. 🙂
LikeLiked by 1 person